If you do any kind of print on demand or fabric design work, it’s important to know how to easily create patterns. You’ll want your pattern to look seamless at any size it is printed. This is where it starts to sound complicated but really it’s not! Luckily, there are several great tools that make pattern designing easy. The top tools to use are either Adobe Illustrator or Photoshop. Since I like to use a lot of hand drawn images in my patterns, Adobe Photoshop works best for me. I’ll show you how to make a pattern in Photoshop with an easy step by step tutorial. Once you learn, you will be wanting to turn everything into a pattern!
Compile Coordinating Images Or Shapes
The first step to any pattern design is choosing what images you want to use in you in your pattern. Whether you want to use drawings, vector images, or simple shapes, having a plan will make the process go smoother. You can go as simple or elaborate as you want. Choose one image to repeat or several images to create a seamless design.
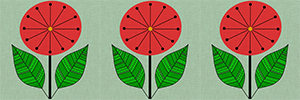
For my example, I wanted to do Spring florals. I regularly create PNG images from drawings that I make so I chose some florals that coordinated well. Now it’s just a matter of putting them together to create a pattern.
How To Make A Pattern In Photoshop
To start, you need to create a new canvas to work from. I like to use a 600px x 600px square canvas at a resolution of 150 pixels/inch. Although a transparent background is what you want to end up with, I fill the bottom layer with white so I can better see my design.

At this point, I place my images onto the canvas. You can rotate, resize, and move each image in a way that lays out nicely and fills the square.

Now I turn off the white background layer and select all of the other layers. Simply click on the first layer and while holding the shift key scroll up and click on the last layer so that all the layers are selected and highlighted. Click on the Layer tab at the top menu bar and then click on merge layers. You can also just right click on any of the selected layers and click on merge layers from there. Now all of the layers are compiled into a single layer and are ready for the next step.
***If you feel that you will always use your pattern with the same color background, you can definitely merge the background layer with the rest. By keeping it transparent, you are just able to use the pattern design on any background.
Finishing Touches

This is where it starts getting fun! With that pattern layer selected, click on the Filter tab, then Other, then Offset. You will have to put in the dimensions for horizontal pixels right and vertical pixels down. These will be half of the pixels of your canvas. So, with a canvas size of 600px x 600px, both your horizontal and vertical pixels with be 300px. Also make sure wraparound is clicked. It should be by default. Now click OK.
Even though it looks like you just broke your pattern, this is what you want. You may see quite a bit of empty space that you want to fill. You can do that with more of the same images you used before or you can add in some new ones.

I wanted to add some solid color so I incorporated a new flower to my design. Once you have your design filled in, you need to merge all of the layers again. Now it’s time to define your finished work as a pattern. Keeping the background layer turned off, go to the Edit tab and then click define pattern. Type in a name for your pattern and then click OK.
Putting Your Pattern Design To Use

At this point, create a new canvas that is larger than your pattern canvas. On the side tab, click on the paint bucket. Go up to the top of the screen and change the paint bucket setting of foreground to pattern. Click on the down arrow to see your saved pattern. The top of the list will have preloaded patterns and at the bottom you will find your own pattern. Select your pattern and then click on your canvas with the paint bucket icon. Like magic you will have a canvas that is filled seamlessly with your pattern. You can turn the background layer on again by clicking the eye.
Since the background layer wasn’t saved as part of your pattern, you can easily change the color of your background any time! Or, instead of filling a shape with just color, add your pattern overlay to it.

That’s it! You now know how to make a pattern in photoshop. Once your pattern is made, you can apply it to products or fabric.

Make sure to check out some of my designs for fabric at Spoonflower.


You must be logged in to post a comment.